
DISCLOSURE: THIS POST MAY CONTAIN AFFILIATE LINKS, MEANING I GET A COMMISSION IF YOU DECIDE TO MAKE A PURCHASE THROUGH MY LINKS, AT NO COST TO YOU. PLEASE READ MY DISCLOSURE FOR MORE INFO.
Are you getting ready to install a smart thermostat and realized there no c-wire or common wire? If so, you have come to the right article to solve your problem.
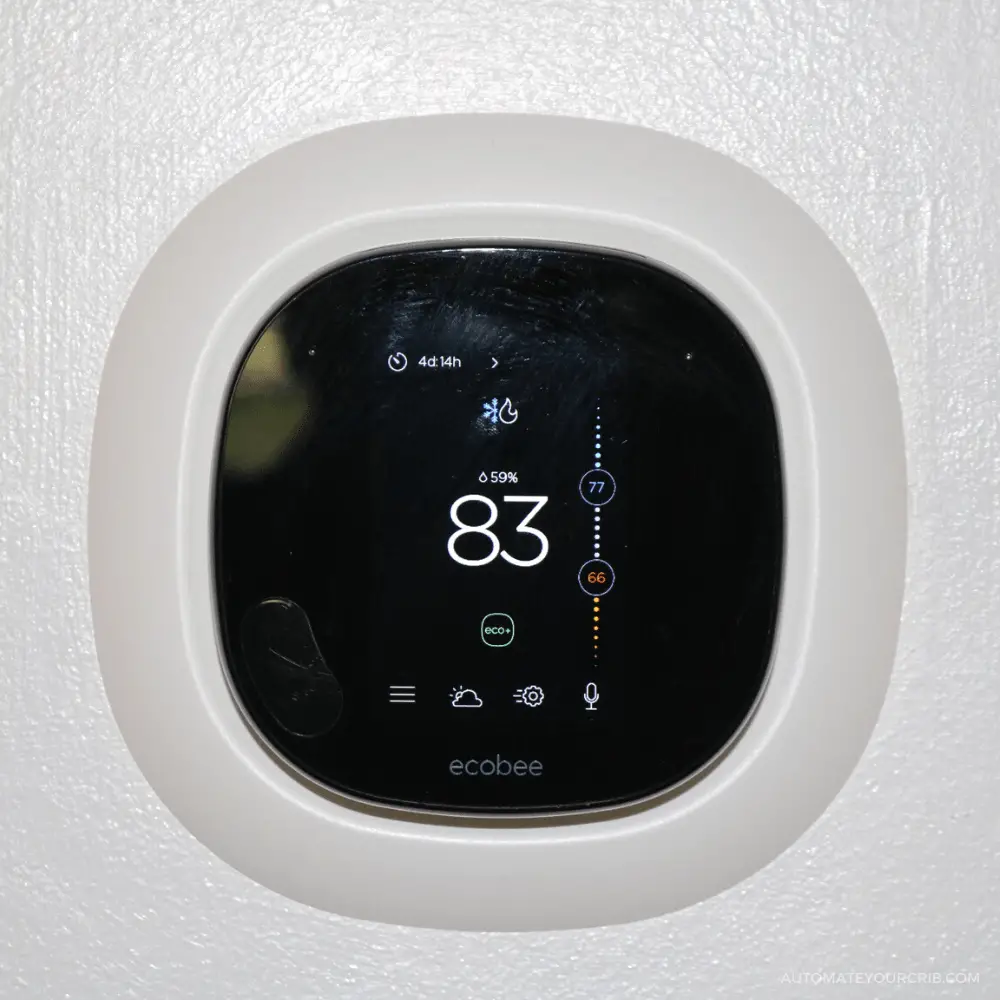
When my wife and I recently purchased our first house, I was really excited to try out new smart home products, and the first device on our list was the ecobee SmartThermostats with Voice Control.
Since we were new homeowners, and we did not want to be overwhelmed with high utility bills we decided to switch our existing thermostat to a smart thermostat.
From our research, having a smart thermostat vs a digital Thermostat can help to reduce our energy usage, which will then reduce our energy bill and allow us to have a more sustainable home.
Also, by having a smart thermostat we are able to control our heating and cooling system through our phone to adjust the temperature even when we are not home.
Now, after receiving our ecobee, reading the instructions, and watching a few smart home YouTube videos on how to install a smart thermostat, I was ready to go.
After removing the existing thermostat, I realized there was one potential installation problem, there was no c-wire.
Unfortunately, the previous thermostat didn’t require one and most older homes do not have a C-wire installed.
The good news there are several options to install a smart thermostat without a C-wire, it just takes some additional work.
The following are the steps I took on how to install a smart thermostat without a C-wire. In the example below, I used an ecobee thermostat during this installation.
What is a c-wire?
Before we begin, let’s understand what is a C-wire also known as a common wire.
A C-wire provides a continuous flow of electricity to your Wi-Fi thermostats which are connected to your heating and cooling system.
C-wire is usually blue or black for 24-volt power to the thermostat.
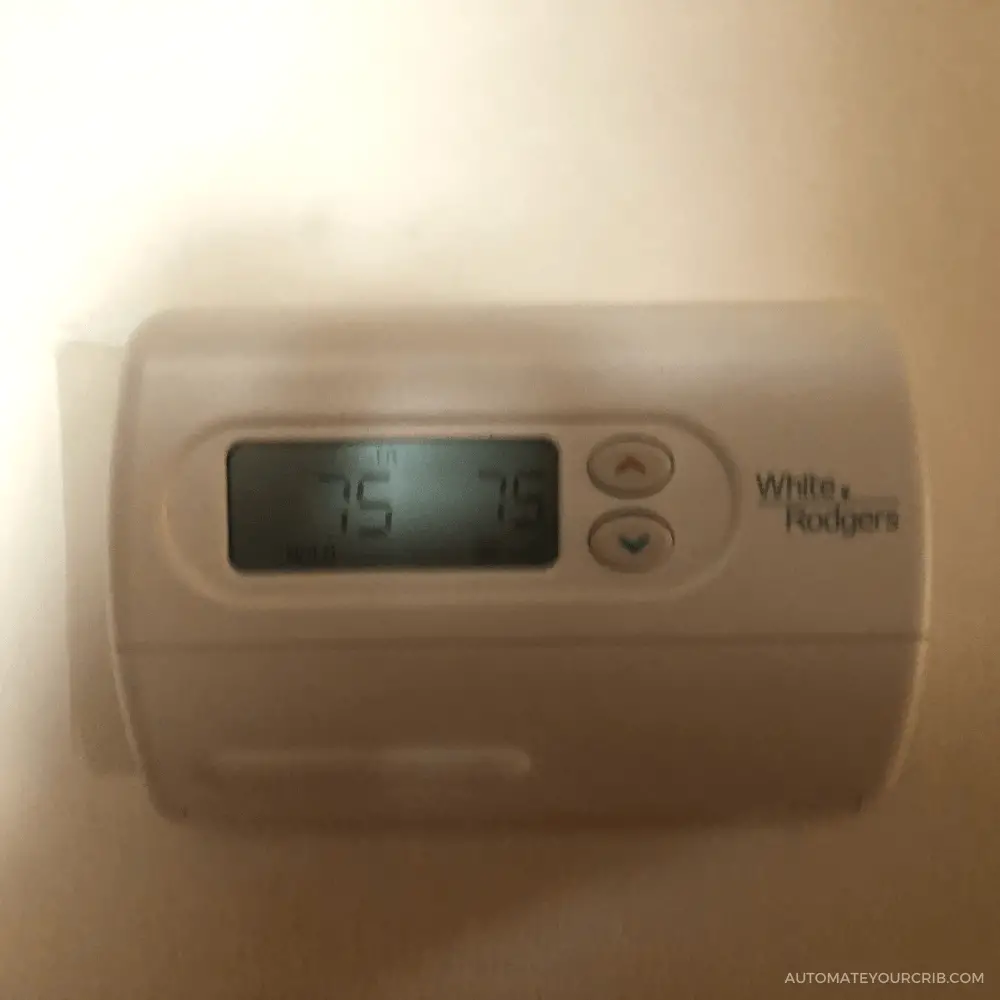
The old thermostat didn’t require a C-wire as most typically run on two or three AA-battery. The older thermostat only needed enough power for the small screen display in front of the thermostat.
Today’s thermostat needs power for geolocation, backlit display, and Wi-Fi functionality. Unfortunately, without a C-wire connected to some labeled terminal, you can’t use a smart thermostat.
How to Install a smart thermostat without a c-wire
First thing first, turn off the power to the HVAC system. You can also do this by turning off the master switch on your circuit box. The circuit box is usually located in your attic, basement, closet, or garage.
Next, check for a C-wire by detaching your existing thermostat and taking a look at the wires connected to it.
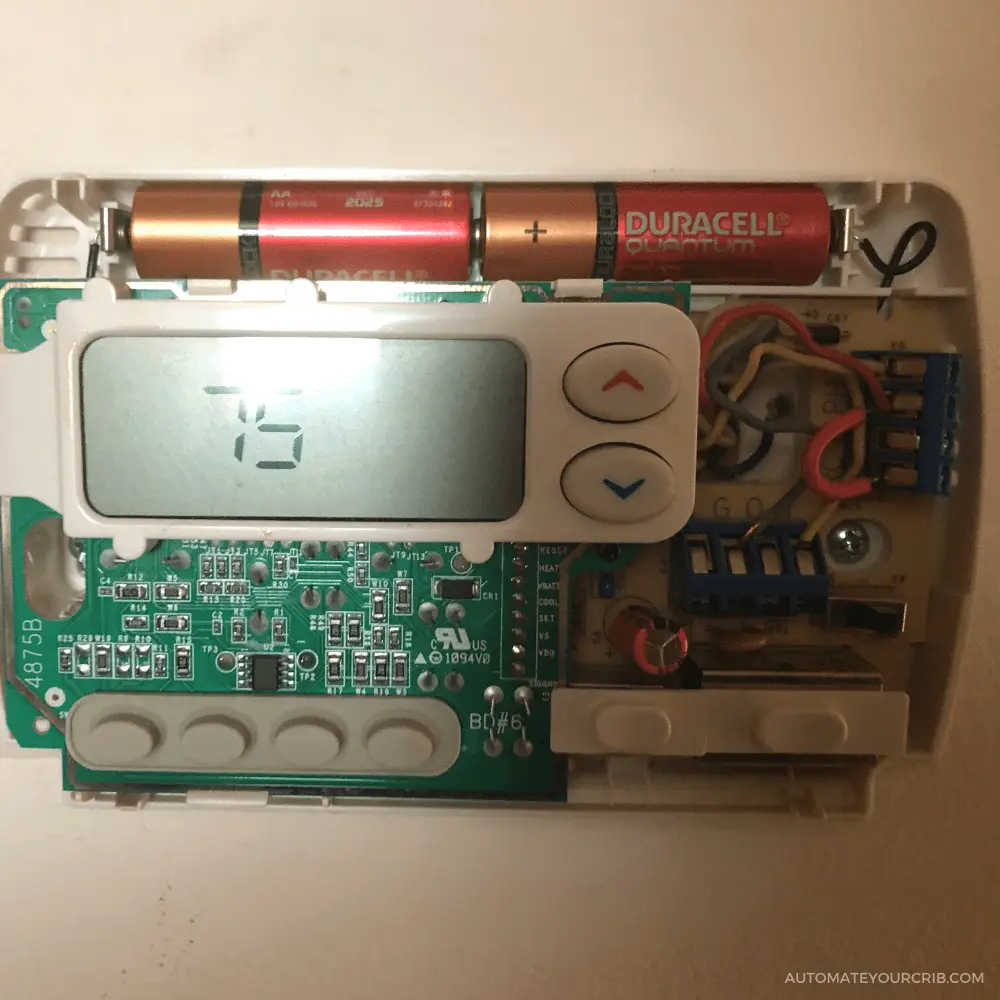
If you see a terminal labeled “C” then you have a C-wire, if there is not, go to your furnace or HVAC system (usually in the Attic, basement, or garage) and check the source.
There is a chance your HVAC control board has a common wire that wasn’t needed during the installation for your existing thermostat, which the wire can be hidden in the wall.

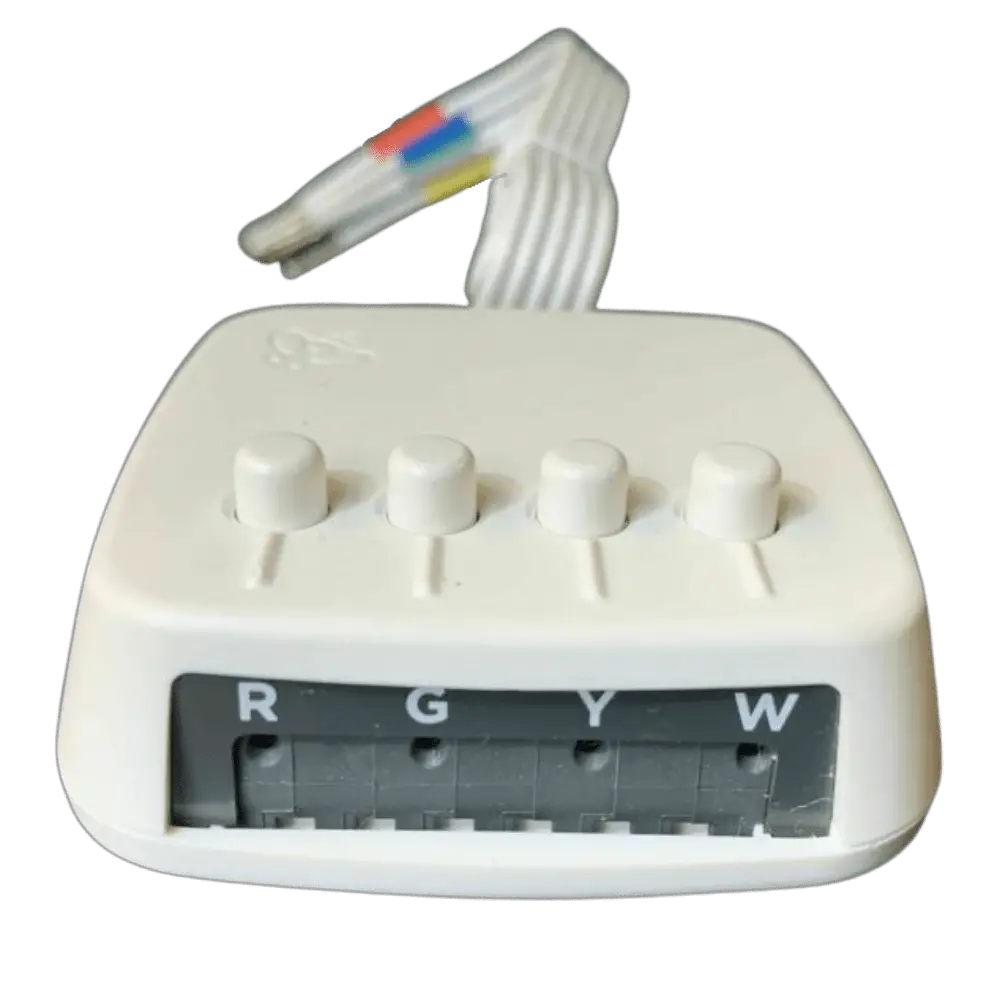
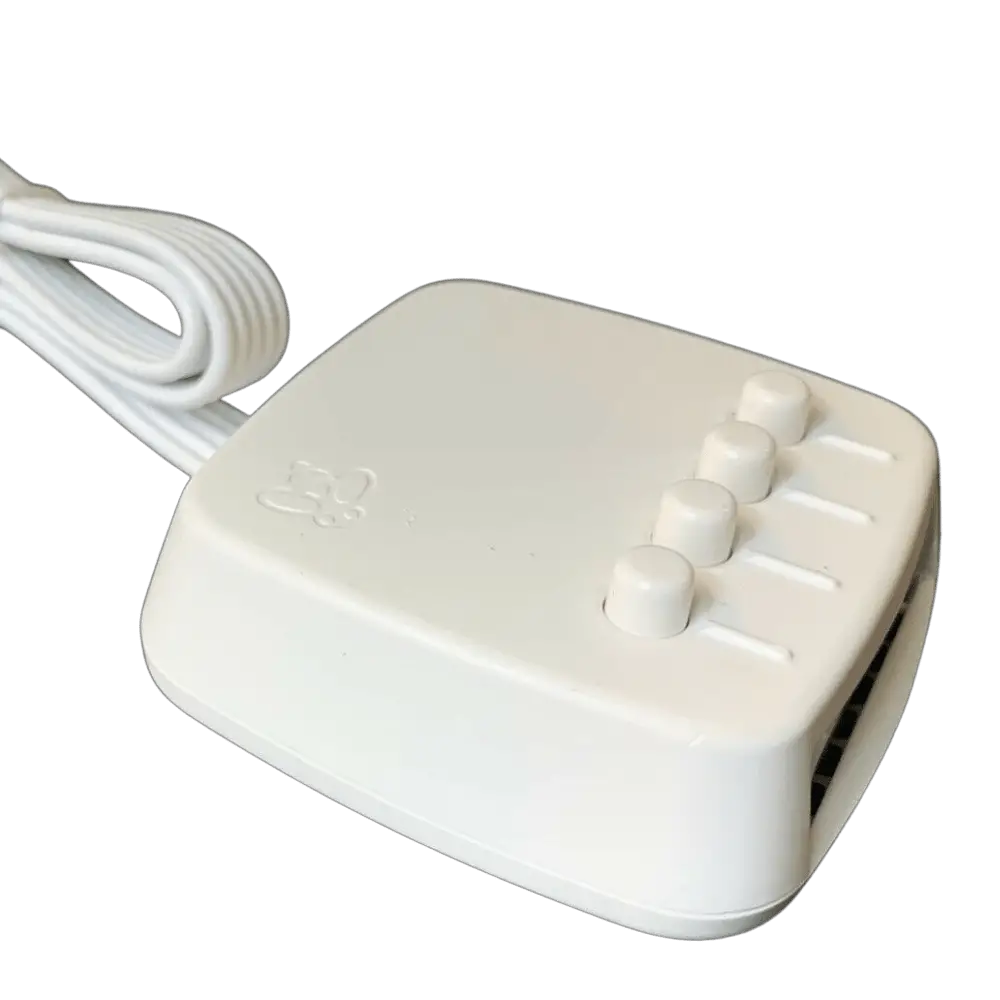
If there no C-wire on the control board, then according to ecobee instructions you will need to use their PEK or also known as the Power Extender Kit.
The PEK adapter is used as a replacement for the C-wire and will only work with the following, ecobee SmartThermostat, ecobee 4, ecobee 3, and ecobee 3 Lite thermostats.
Before we go any further, I would like to state this.
I am not a certified electrician and if you continue, you are doing this install at your own risk.
For any reason you are uncomfortable, you should contact ecobee for instructions or hire your local licensed electrician.
Trust me, I understand, as I was very nervous, especially being a new homeowner. I had no clue what I was doing, but I was willing to try.
Now, that we have that out of the way let’s begin.
Step – 1 Get out your tools
Before you remove the wires from the backplate, double-check to see if the power is off with a voltage tester. If you don’t have an electric tester tool kit, you can find one at your nearest big-box retailer or online.
It’s always good to test the wires for power before touching them. Here is a checklist of the tools you may need before you start:
- Drill
- Small screwdriver
- Phillips screwdriver
- Hammer
- Pencil
- Wire stripper
- Voltage tester
- Flashlight
- Touch up paint (Use the same paint and color matching wall)
Step – 2 Identify the old wiring
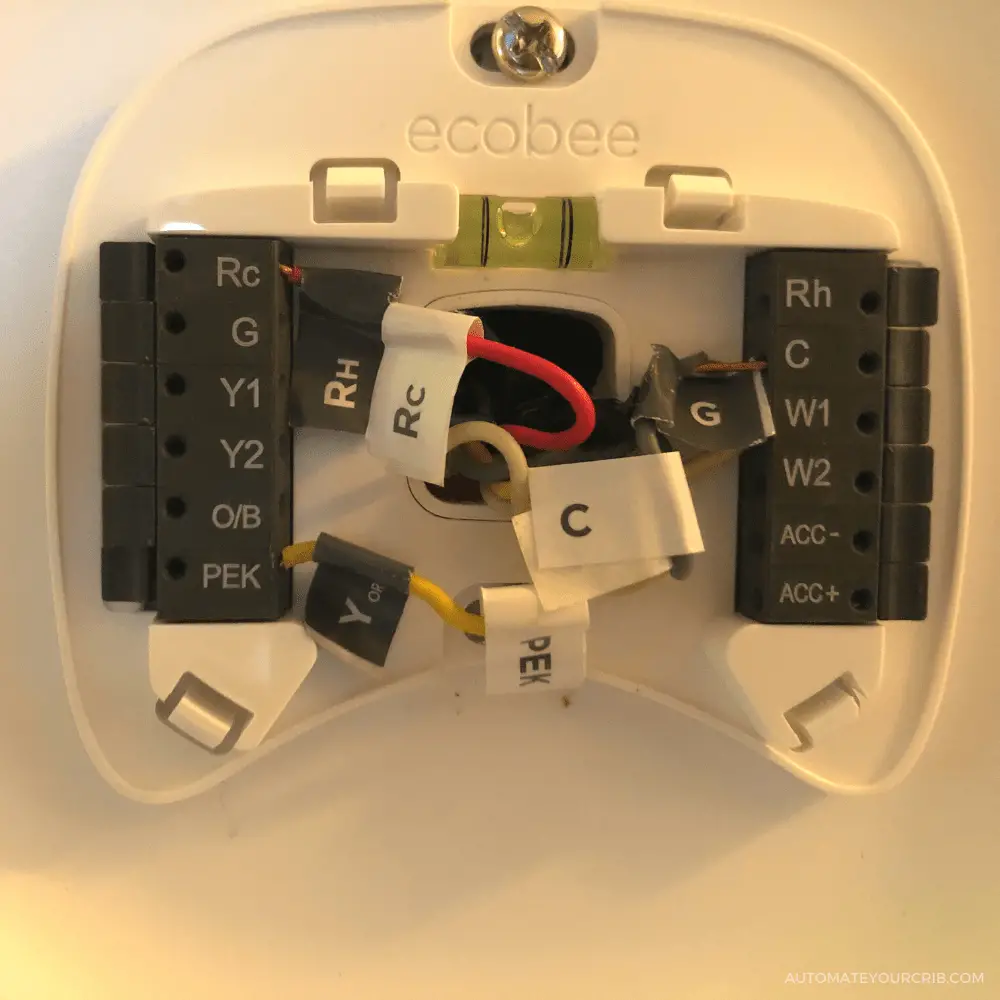
After you confirmed the power is off, the next step is to identify the old wiring from the existing thermostat. Once you have identified the wires, start removing and labeling them with each sticker label ecobee provides.
Or take a snap picture of the wires that are located on the back of your old thermostat. I did both.
Step 3 – Remove the existing backplate
Gently remove the backplate from the wall. It’s usually held in place by two to four screws into the wall.
Step 4 – Install the new smart thermostat
Now, here comes the solution to the problem. Since we already established you do not have a C-wire, you will need to go to your furnace or HAVC system with the Power Extender Kit (PEK) adapter ecobee provides you.
Note: The PEK requires certain wires for your system in order to work.
- 4 Wires: y/y1, R, G, W/W1
- 3 Wires: R, y/y1, and G
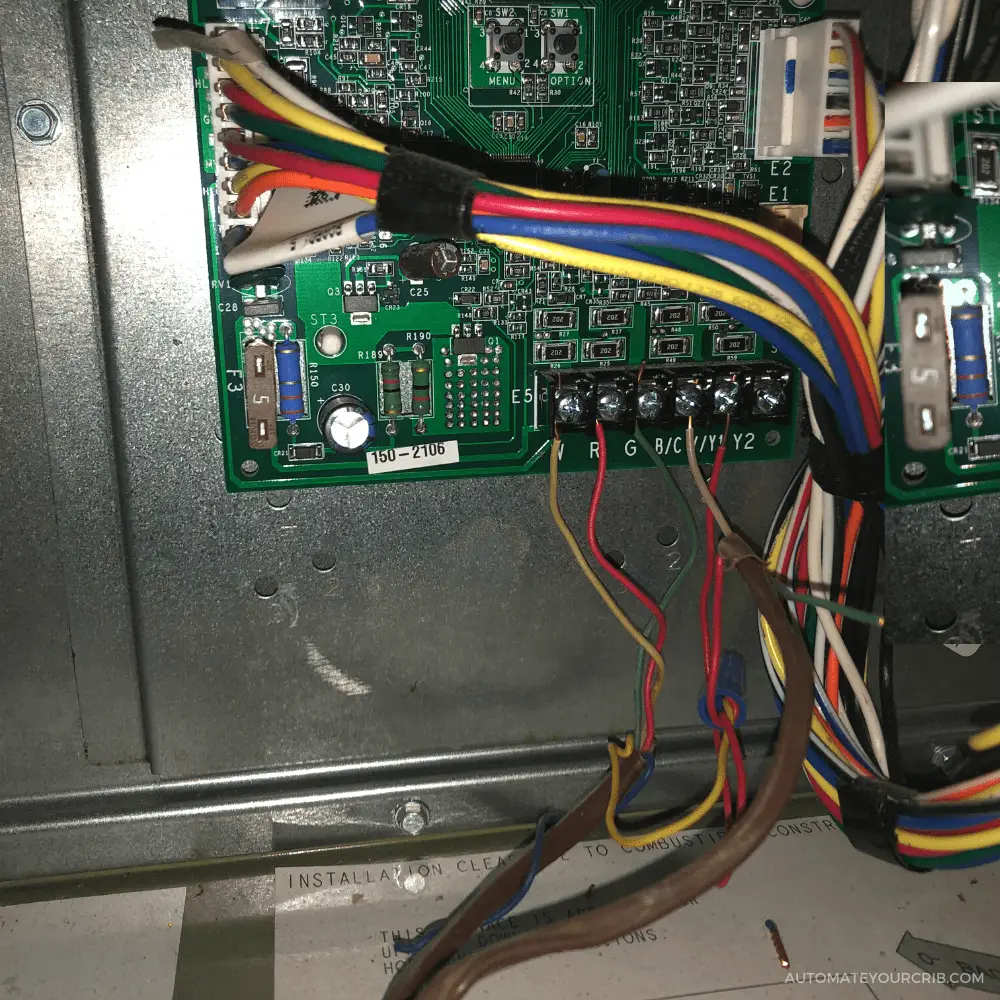
Open the furnace or HVAC cover or covers off, and take a picture of the wires that are connected to the control board. This will be good for reference.
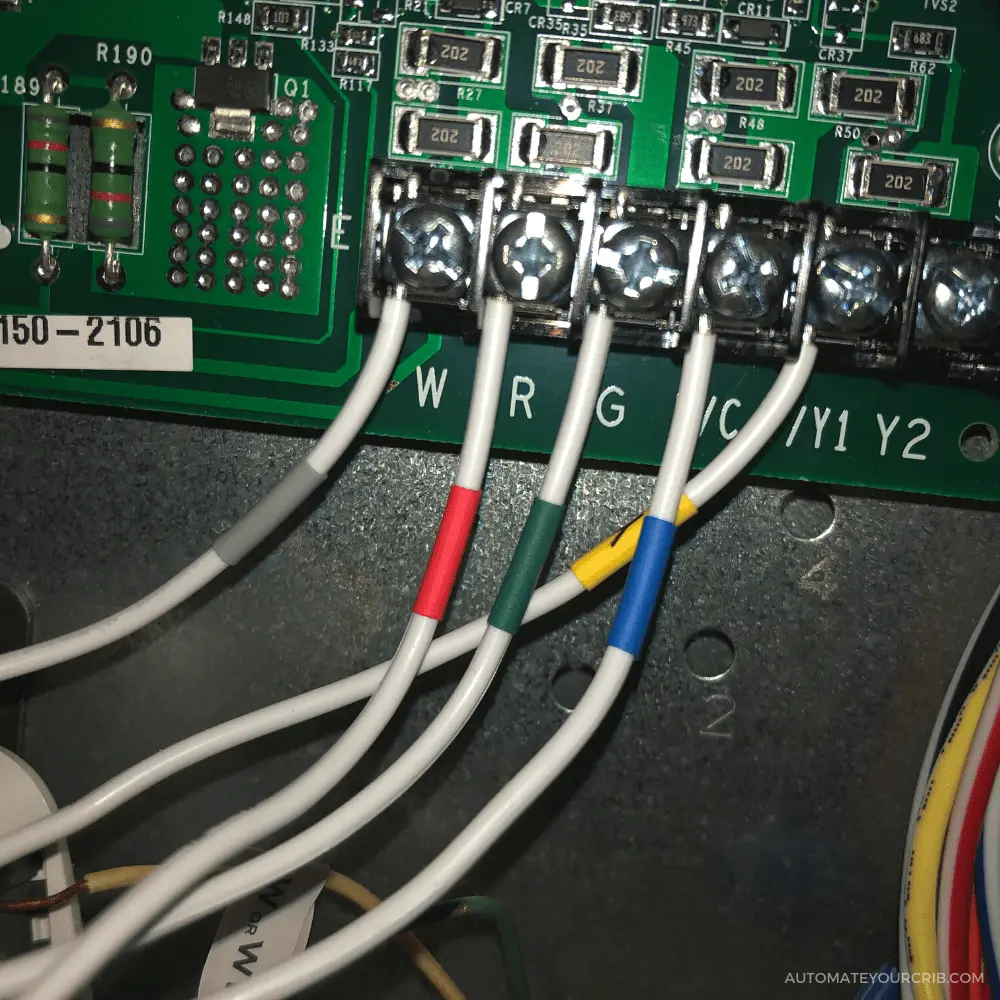
Step 5 – Disconnect the wires from the control board
You can now label each wire as we did with the thermostat wires for assistance. Next, disconnect the R, Y, G, and W wires from the control board, and re-connect them to the matching white terminal blocks located on the PEK.
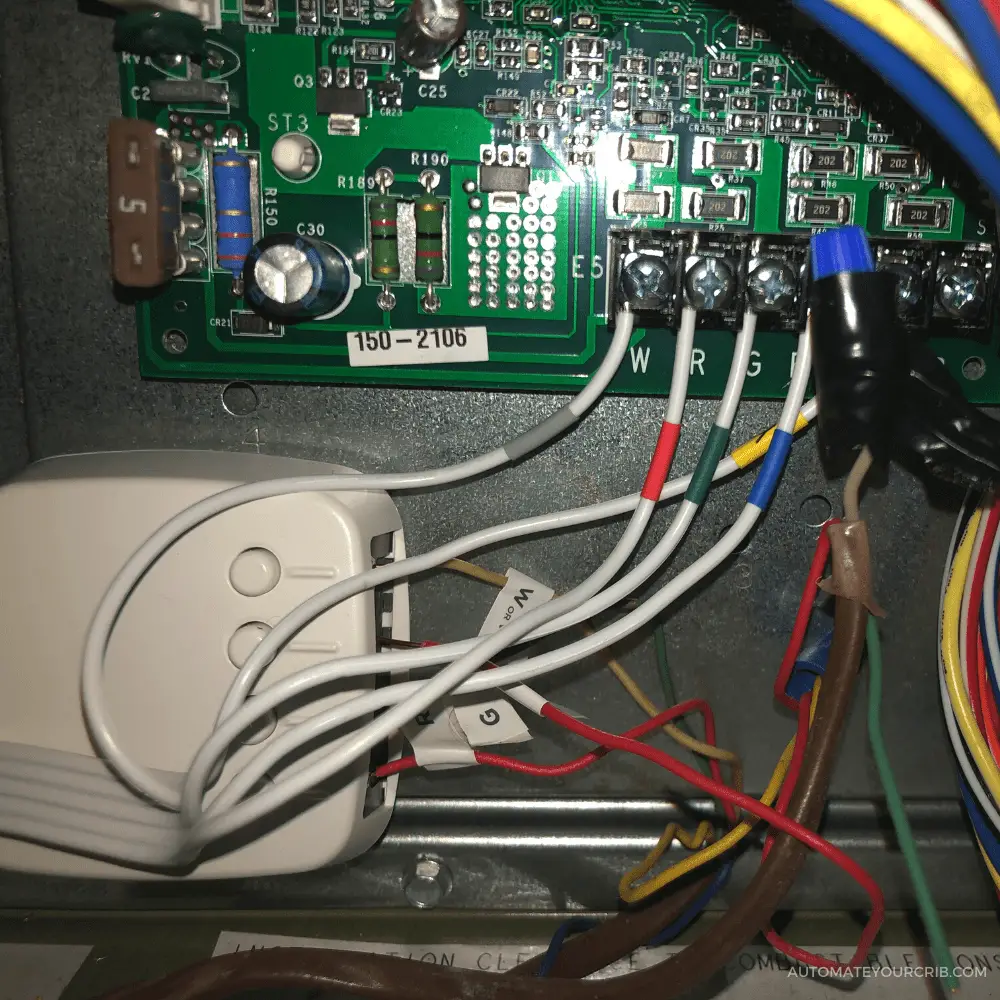
Step 6 – Install the PEK adapter
Once you label the wires, you can connect the five white wires that are coming out of the Power Extender Kit to the terminals on the control board. Here is an example below of how your control board and PEK should look:
Step 7 – Confirmed wires are connected
After you’ve confirmed all the wires are securely connected, close your furnace or HVAC system and return to the ecobee.
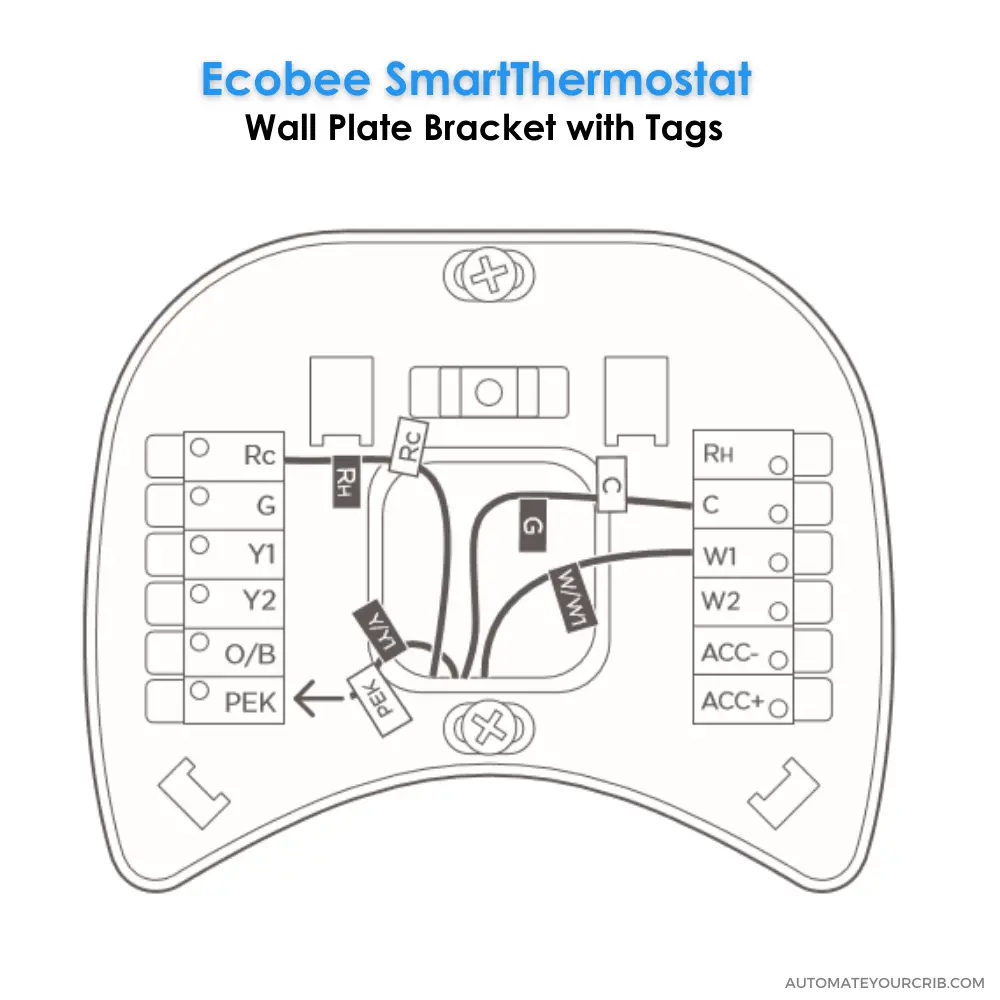
Step 8 – Wiring your new thermostat
Now, here comes the easy part. Install the larger trim plate for the ecobee. Pull the wires through the hole located in the middle of the backplate.
Next, insert each wire labeled to the matching terminal on the ecobee. In this order:
- R or RC wire – RC terminal
- G wire – C terminal
- Y wire – PEK terminal
- W wire – W1 terminal
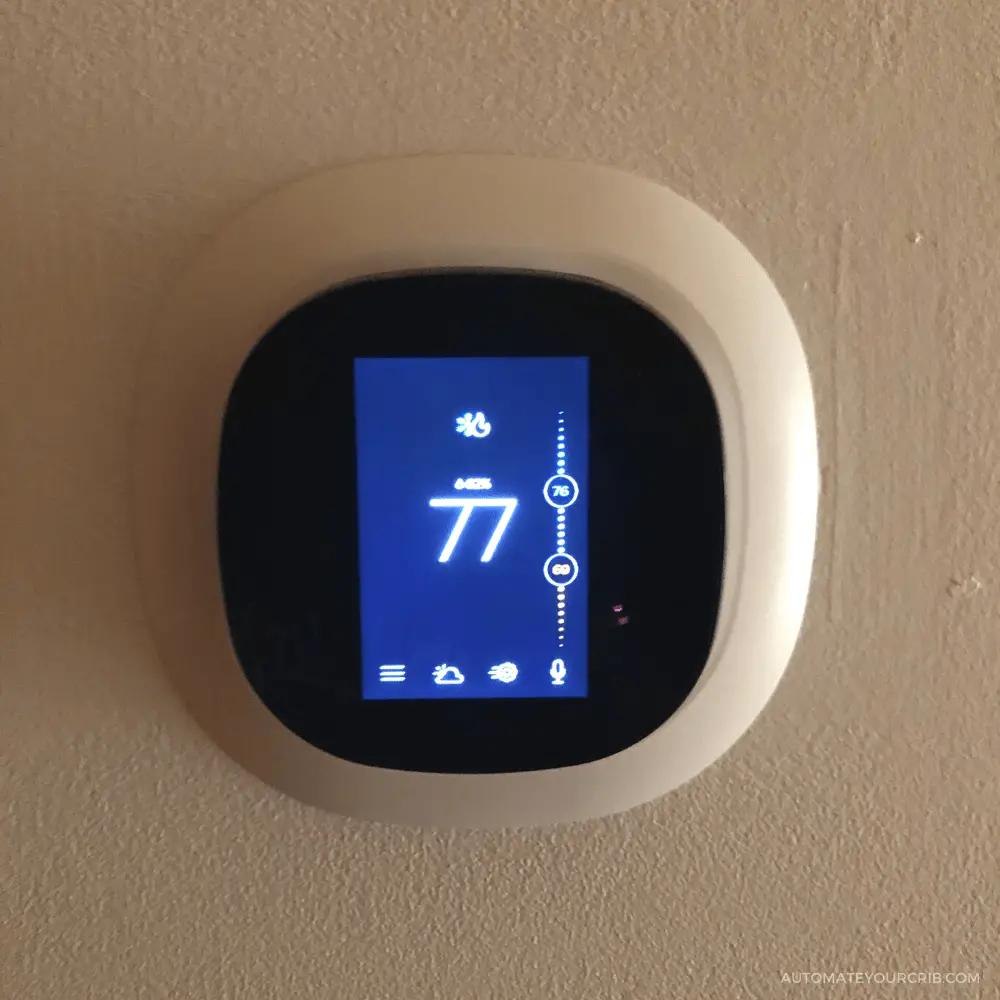
Step 9 – Turn your HVAC system back on
Press your ecobee thermostat on the wall mount and click it shut, and restore power to your HVAC system back on!
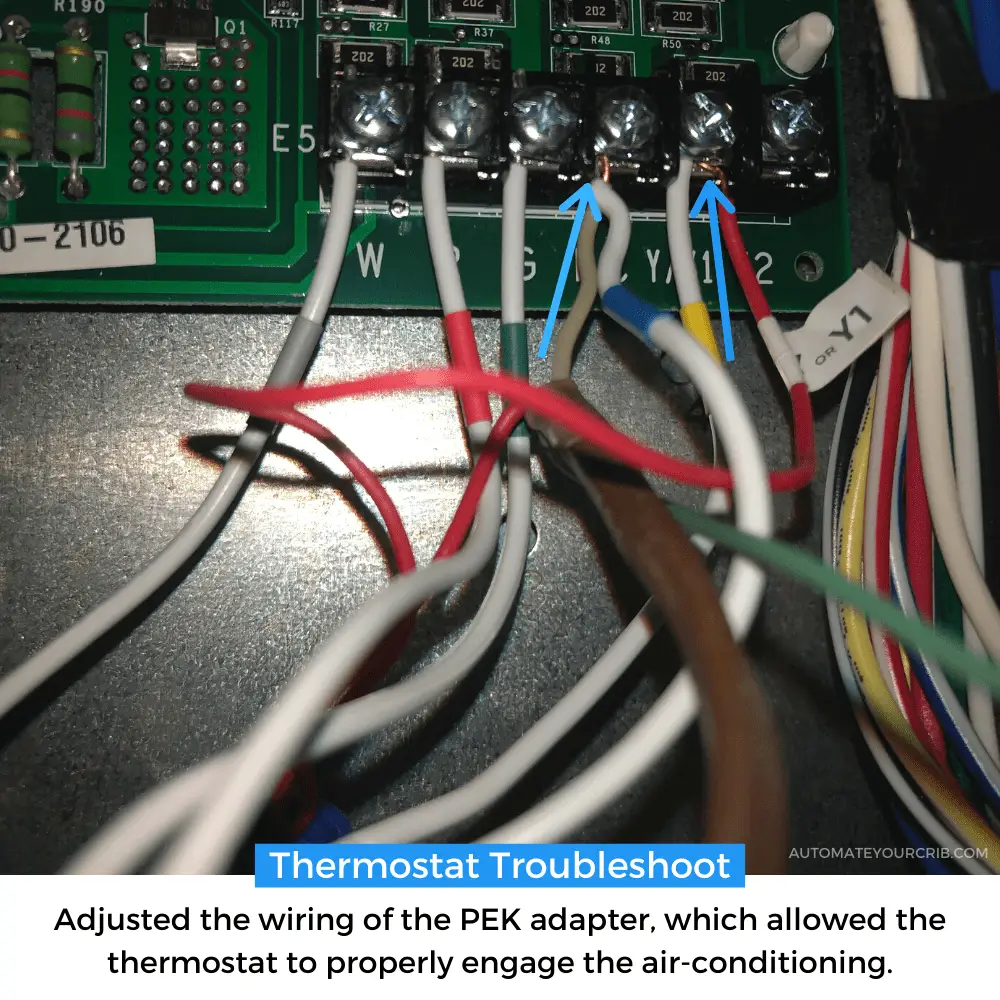
Thermostat Troubleshoot:
Our Air conditioning won’t turn on
After restoring the power to our HVAC, the ecobee powered on but we noticed an issue, our air conditioning wasn’t turning on.
We felt air coming out of the vents but it wasn’t cooling down the house. We went over the instructions, check all the wires from the thermostat to the furnace, and ensure they are securely connected to the terminals.
There seem to be no connecting issues, so, we gave it a day to see if anything will change.
We contacted ecobee support team
The next morning the air conditioner still wasn’t turning on, we decided to contact ecobee (877-932-6233) for further assistance.
We explained the problem to Devon from the ecobee support team. To help him identify any potential issues we sent clear photos of the wiring from the ecobee thermostat, HVAC control board, and PEK.
Everything I did was correct but there was an issue with the old wiring.
As I mentioned earlier, we recently purchased our first house, and the previous owner of the house did a lot of the electrical wiring (DIY electrical work) himself which caused the issue.
Eventually, we found out, that we had faulty wiring throughout our home but that’s a whole different topic for a later time.
Once Devon was able to figure out a solution without us calling an electrician, which would have cost hundreds of dollars.
He had me adjust the wiring of the PEK adapter, which allowed the thermostat to properly engage the air-conditioning.
Devon from ecobee was a lifesaver and helped us solve our problem without spending any additional cost.
What to do if your smart thermostat is not working properly?
If you are running into any issues with your smart thermostat it could be one of a few things. So, you’ll want to ensure that you follow the steps below to make sure that everything is working properly.
- Check the wiring at your smart thermostat
- Check the wiring at your air handler/furnace
- Check the equipment configuration
- Check your threshold settings
If you are still having trouble, contact the smart thermostat company or if you have an ecobee, contact 877-932-6233 or send a message, for further assistance.
How to power a smart thermostat with an external transformer?
Now, to be honest, I have not tried to install a smart thermostat with an external transformer, but I thought this was an easy solution to the problem without hiring a professional electrician.
A licensed electrician can cost you an average of between $200 and $400 to install a new thermostat wire in the wall to your boiler or furnace.
In the video below, he used a Honeywell thermostat during this installation, but this can work with any Wi-Fi thermostat without a c (common) wire.

If you are interested in a 24-volt transformer adapter, you can find them on Amazon.
Final Note
After I was done installing the ecobee smart thermostat without a c-wire, it was an exciting moment to know I did it, and it works without hiring a professional electrician to do the job.
The only hiccup was the faulty wiring, but I was able to still do the job with some assistance from the ecobee support team.
Ecobee or any smart thermostat makes the setup process easy by either downloading the app, watching the YouTube video, or following the instructions that come with the product.
If you have questions you can always contact the company before purchasing the device.
Thanks to ecobee, we can save money and control the temperature from the comfort of our bed.
Please, don’t forget to check out the recommended gadgets page for the best tech for your buck.
For more useful tips and tricks with Home automation, please continue to check out AutomateYourCrib.com.
Please e-mail me (rodney@automateyourcrib.com) your opinion, or comment or if you have any ideas for a future post you would like to read, drop me a line or two as I appreciate my audience. Thank you again for reading this post.
Until next time, enjoy!
Please be sure to follow me on Social Media!
It's great to see that you have come across my website. I hope you explore it thoroughly. The website caters to regular consumers who have an interest in home automation. I am based in the Tri-state area and enjoy the latest smart tech along with my wonderful wife and three energetic boys.